How to Create Age Calculator Tool in Blogger in Hindi
नमस्कार दोस्तो! स्वागत है आपका Techly360 ब्लॉग में।तो आज के इस आर्टिकल में हम बात करने वाले है How to Create Age Calculator Tool in Blogger in Hindi के बारे में। and ये Blogger me Age Calculator website kaise banaye। तो इन सभी बातों को हम इस Article में जानेंगे। तो बने रहिये इस Article में और जानिए पूरे Details में।
आजकल Blogging एक अगर ही लेवल पर है| तो ऐसे में Blogging Sector में अलग अलग विभाग भी है| तो इसी में से एक है Web Tools का| तो मेरे बहुत सारे Subscribers ने मुझसे Comment में पूछा है की क्या हम आसानी से Blogger/Blogspot Platform पर Age Calculator Tool बना सकते है?
मैं आपको साफ़ साफ़ बता दूँ की Age Calculator का एक अलग ही trend चल रहा है| तो ऐसे में सभी लोग चाहते है की उनका एक खुद का age calculator tool हो| तो ऐसे में मैं इस पोस्ट में विस्तारपूर्वक बताया है की कैसे आप आसानी उम्र बताने वाली टूल बना सकते है|
Age Calculator Tool क्या है?
बहुत सारे New Bloggers है जो की अभी अभी Blogging के क्षेत्र में कदम रखा है| जो उन्हें अब कुछ नया करना है इस Blogging Industries में| तो ऐसे में सभी लोग बस यही चाहते है की सबसे कुछ अलग किया जाए| तो ऐसे में एक टूल आता है age calculator के नाम से|
तो बहुत सारे लोग इस टूल के बारे में नही जानते है| तो मैं उनको बता दूँ Age calculator tool की मदद से हम आसानी से अपने उम्र का पता लगा सकते है| वैसे तो उम्र कितनी हुई है और भी जानकारिय निकालने के बहुत सारे रास्ते है| लेकिन अगर इस टूल का इस्तेमाल करेंगे तो आप चुटकियों में अपना सही उम्र पता कर सकते है|
इन्हें भी पढ़े-
- Disable CTRL+U, CTRL+C, and Mouse Right Click on Blogger
- How to Create Live TV Website in Blogger
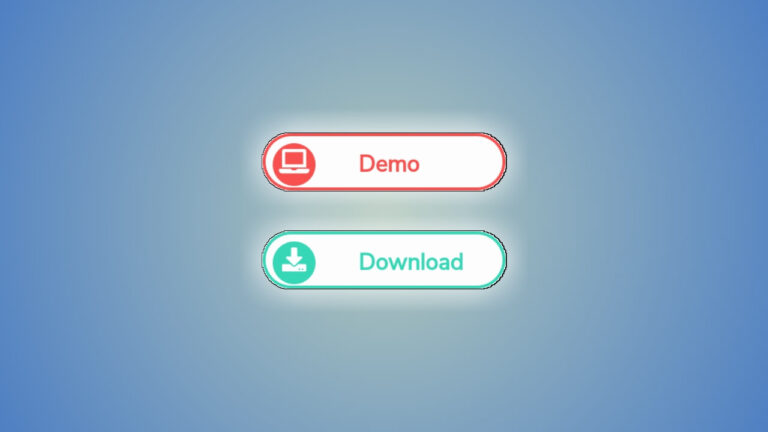
- Add Stylish CSS Slider Demo and Download Button
- How To Add Breaking News Ticker in Blogger
- Instagram Image & Video Downloader Tool Script
Steps to Create Age Calculator Tool in Blogger
So दोस्तों अब मैंने निचे आपको कुछ steps बताया है| जिसको आप फॉलो करके आसानी से अपने blogger blog में इस age calculator tool को free में बना सकते है| वैसे तो आपको इन्टरनेट पर बहुत सारे इस एज कैलकुलेटर टूल से सम्बंधित टूल वेबसाइट मिल जाते है|
और सबसे डिजाईन अलग अलग होते है| तो ऐसे में मैंने जो आपको टूल निचे मुहैया करवाया है तो पूरी तरीके से Unique है| मैंने निचे इस टूल को बनाने के लिए HTML, CSS और JavaScript Code उपलब्ध कराया है| और आपको सभी स्टेप्स फॉलो करने होंगे|
Step #1 – Download & Install Blogger Blank Template
सबसे अफ्ले आपको निचे Download Button पर क्लिक करके Blank Blogger Template को डाउनलोड करना है| फिर इसे Notepad में एडिट करके अपने ब्लॉगर साईट में इनस्टॉल करना है|
Step #2 – Use JavaScript
तो दोस्तों अब मैंने निचे Box में JavaScript Code उपलब्ध कराया है| इसे आपको कॉपी कर लेना है| अब आपको Blogger Dashboard>Layout>Add a Gadget>HTML/JavaScript में जाना है| आप अपने जो कोड कॉपी किया था| उस कोड को पेस्ट करके सवसे कर दे|
<script>
let display = document.getElementById("display");
let input = document.getElementsByTagName("input");
let button = document.getElementsByTagName("button");
let time = document.getElementById("time");
let disBlock = document.getElementById("disBlock");
let disBD = document.getElementById("disBD");
let creditBlock = document.getElementById("postCredit");
let credit = document.getElementById("credit");
let about = document.getElementById("about");
disBlock.style.display = "none";
creditBlock.style.display = "none";
let dob = new Date(), today = new Date(), calTime;
function samay() {
	let d = new Date();
	time.innerHTML = d.getHours() + " Hours, " +
		d.getMinutes() + " Minutes, " + d.getSeconds() + " Seconds Old";
}
function calculate() {
	disBlock.style.display = "block";
	creditBlock.style.display = "block";
	credit.innerHTML = "Thank You For Visiting<br>I am Techly360.com";
	let x = input[1].value.split("-");
	dob.setDate(x[2]);
	dob.setMonth(x[1] - 1);
	dob.setFullYear(x[0]);
	let year, month, day, HBD;
	day = (function() {
		if(today.getDate() > dob.getDate()) {
			return today.getDate() - dob.getDate() - 1;
		}
		else if(today.getDate() == dob.getDate()) {
			return today.getDate() - dob.getDate();
		}
		else {
			let calDate = new Date(dob.getFullYear(), dob.getMonth() + 1, 0);
			return (today.getDate() + calDate.getDate()) - dob.getDate() - 1;
		}
	}());
	month = (function() {
		if(today.getMonth() >= dob.getMonth()) {
			if(today.getDate() >= dob.getDate()) {
				return today.getMonth() - dob.getMonth();
			}
			else {
				if((today.getMonth() - 1) >= dob.getMonth()) {
					return (today.getMonth() - 1) - dob.getMonth();
				}
				else {
					return ((today.getMonth() - 1) + 12) - dob.getMonth();
				}
			}
		}
		else {
			if(today.getDate() >= dob.getDate()) {
				return (today.getMonth() + 12) - dob.getMonth();
			}
			else {
				return ((today.getMonth() - 1) + 12) - dob.getMonth();
			}
		}
	}());
	year = (function() {
		if(dob.getMonth() == today.getMonth()) {
			if(dob.getDate() > today.getDate()) {
				return (today.getFullYear() - 1) - dob.getFullYear();
			}
			else {
				return today.getFullYear() - dob.getFullYear();
			}
		}
		else {
			if(dob.getMonth() > today.getMonth()) {
				return (today.getFullYear() - 1) - dob.getFullYear();
			}
			else {
				return today.getFullYear() - dob.getFullYear();
			}
		}
	}());
	HBD = (function(){
		if(today.getMonth() == dob.getMonth()) {
			if(today.getDate() == dob.getDate()) {
				disBD.innerHTML = "OMG it's your Birthday<br>Happy Birthday To You<br>";
			}
			else {
				disBD.innerHTML = "";
			}
		}
		else {
			disBD.innerHTML = "";
		}
	}());
	display.innerHTML = "Hi Dear " + input[0].value + ", <br/>You are " + year + " Years, " + month +
	" Months, " + day + " Days, ";
	calTime = setInterval(samay, 1000);
}
button[0].onclick = calculate;//when calculate button is clicked
function reset() {
	input[0].focus();
	display.innerHTML = "";
	time.innerHTML = null;
	clearInterval(calTime);
	disBlock.style.display = "none";
	creditBlock.style.display = "none";
}
button[1].onclick = reset;//when the reset button is clicked
</script>
Step #3 – Use CSS
अब आपको निचे कुछ CSS Script भी मिल जाएगा| तो आपको भी इसे कॉपी करके आसानी से उपर दिय गये स्टेप्स को फॉलो करके ही पेस्ट करके सेव कर देना है|
<style>
@import url('https://fonts.googleapis.com/css?family=Gotu&display=swap');
body {
  background-color: dodgerblue;
  font-family: 'Gotu', sans-serif;
  color: white;
}
label {
	font-size: 20px;
}
form {
	text-align: center;
}
input {
	border: 0;
	padding: 10px 20px;
	font-size: 20px;
	border-radius: 50px;
	margin: 5px;
}
h2 {
	text-align: center;
}
button {
	padding: 10px;
	width: 300px;
	margin: 10px 0;
	font-size: 20px;
	border: 0;
}
button:focus, button:hover {
	background-color: black;
	color: white;
}
p {
	text-align: center;
}
div {
	border: 1px solid white;
	background-color: black;
	text-align: center;
}
#postCredit {
	background-color: powderblue;
	color: black;
}
a {
	text-decoration: none;
	color: black;
	display: block;
	padding: 10px;
	background-color: white;
}
a:hover {
	background-color: cyan;
}
h1 {
	background-color: black;
	margin: 0 0 20px 0;
	padding: 10px;
	text-align: center;
}
</style>
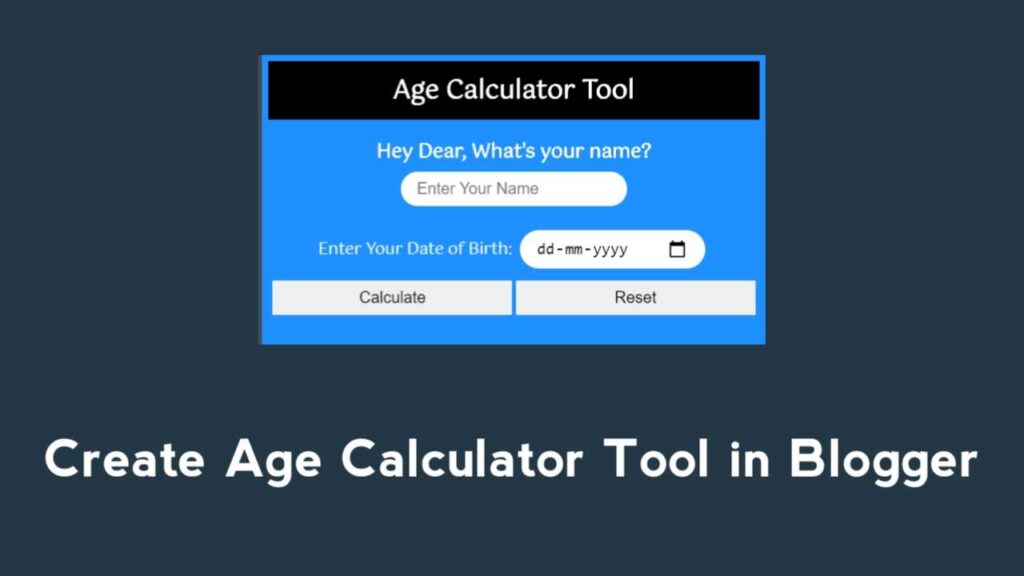
Step #4 – Use HTML
अब आपको निचे मैंने कुछ HTML Script दिए है और इन्हें भी कॉपी करके ठीक उपर दिए गये स्टेप्स को फॉलो करके पेस्ट कर देना है|
<h1>Age Calculator Tool</h1>
<h2>Hey Dear, What's your name? <br /><input type = "text" placeholder = "Enter Your Name" autofocus/></h2>
<div id = "disBlock">
		<p id = "disBD"></p>
		<p id = "display"></p>
		<p id = "time"></p>
</div>
<div id = "postCredit">
		<p id = "credit"></p>
		<a id = "about" href="https://www.facebook.com/rohit.baidya.338/" target="_blank">Know More About Me</a>
</div>
<form>
		<label>Enter Your Date of Birth: <input
		type = "date"/></label><br />
		<button type = "button">Calculate</button>
		<button type = "reset">Reset</button>
</form>
निष्कर्ष – आपको यह How to Create Age Calculator Tool in Blogger in Hindi का आर्टिकल कैसा लगा।आप नीचे कमेंट बॉक्स में कमेंट करके जरूर बताएं।या किसी प्रकार का Suggestion देना भी चाहते है तो आप नीचे Comment Box में अपनी राय हमारे साथ Share कर सकते है।